標籤彙整: xcode

產生針對 AR 優化的 USDZ 檔案

USDZ 可以想成 USD (Universal Scene Description) 的加強版,這是 Pixar 和 Apple 合作的新格式並針對 AR 優化,雖然是以 zip 封裝,但並沒有壓縮及加密,所以其他程式能直接調用。

目前沒有任何的 3D 繪圖軟體能原生支援此格式,也沒有插件可以使用,原因可能是因為要依附 Xcode 10 的 usdz_converter 工具來產生的關係,所以作業系統必須是 macOS 。

輸入來源可以是 obj 或 usda 格式,大部分的 3D 模型分享網站一定都會有提供 obj 的下載格式,可以從 SketchfabGoogle Poly 找免費的試試看。


xcrun usdz_converter cube.obj cube.usdz

使用此指令就能產生 usdz 格式了,但是 obj 使用後只有模型沒有材質!
usdz 採用的是 PBR (Physically based rendering) ,這方面我不懂就不多提了。

xcrun usdz_converter cube.obj cube.usdz \
-g cubeMesh \
-color_map cube_Albedo.png \
-metallic_map cube_Metallic.png \
-roughness_map cube_Roughness.png \
-normal_map .  cube_Normal.png \
-emissive_map  cube_Emissive.png \

反正就是依照圖檔名稱對應相對的指令即可。


xcrun usdz_converter -h

使用此指令能看到更詳細的說明

USAGE:
<inFilePath> <outFilePath> [options...]
	Options:
                -g groupName [groupNames ...]       Apply subsequent material properties to the named group(s).
                -m materialName [materialNames ...] Apply subsequent material properties to the named material(s).
                -h                                  Display help.
                -a                                  Generate a .usda intermediate file.  Default is .usdc.
                -l                                  Leave the intermediate .usd file in the source folder.
                -v                                  Verbose output.
                -f                    filePath      Read commands from a file.
                -texCoordSet          set           The name of the texturemap coordinate set to use if multiple exist (no quotes).
                -opacity              o             Floating point value 0.0 ... 1.0
                -color_map            filePath
                -normal_map           filePath
                -emissive_map         filePath
                -metallic_map         filePath
                -roughness_map        filePath
                -ao_map               filePath
                -color_default        r g b a        Floating point values 0.0 ... 1.0
                -normal_default       r g b a
                -emissive_default     r g b a
                -metallic_default     r g b a
                -roughness_default    r g b a
                -ao_default           r g b a

(*) Specify infield only with -v (Verbose) to display group information.
(*) '#' in the first character position of a line in a command file interprets the line as a comment.


查了一下能直接線上轉的網站只有 Vectary ,大概要等 Adobe 支援才會有更多人用吧。
有了 usdz 檔案就可以參考這篇文章在網站及 App 中顯示。


參考資料
https://developer.apple.com/arkit/
https://graphics.pixar.com/usd/docs/Usdz-File-Format-Specification.html
 

實現 iOS App 與網站之間互通的 Universal Links

Universal Links 是網站與應用程式之間的橋樑,可以將使用者從網站導引至應用程式。比如說有個網址是 http://www.example.com/book/12345678 ,在 iOS 上用 Safari 瀏覽時剛好也有安裝 App 端,網頁最上方就會出現一個  "在「XXX」App 中打開" 的橫幅,點擊就會開啟 App 端進到指定的頁面。

你可能對於 URL Schemes 不陌生,以前要從網頁連到 App 需要判斷是否有安裝該 App,然後分別連到 App 下載頁面或是開啟 App 到某一頁。現在有了 Universal Links 確實方便許多,至少已安裝的部分系統已經幫你處理好了。


Apple Developer 設定

先去 iOS App IDs 確定該 ID 的 Associated Domains 為啟用狀態。


Xcode 專案設定

Target → Capabilities → 打開 Associated Domains → + → "applinks:example.com"


Web 設定

新增一個 apple-app-site-association 檔案(沒有副檔名),內容如下:

{
    "applinks": {
        "apps": [],
        "details": [
            {
                "appID": "D3KQX62K1A.com.example.DemoApp",
                "paths": [
                    "*"
                ]
            }
        ]
    }
}

若已有這個檔案,只要加入 applinks 這個層級並保持 JSON 結構即可。
D3KQX62K1A 為 Team ID ,可以從這裡找到。
com.example.DemoApp 為 Bundle Identifier 。
paths 裡寫 "*" 代表整個網站都會處理,初期為測試方便所以先全部接收,如果只想接收 /book 就寫 "/book"。另外除了 "*" 也能搭配使用 "?" 及 "NOT" 使用。

將此檔案放在網站的 .well-known 資料夾下,整個網址就像這樣 https://example.com/.well-known/apple-app-site-association ,需注意必須要 https:// 開頭,如果有子網域也要分別作設定。每當 App 安裝或是更新版本才會去抓 apple-app-site-association 。


程式碼設定

func application(_ application: UIApplication, continue userActivity: NSUserActivity, restorationHandler: @escaping ([Any]?) -> Void) -> Bool {
        
    // 來源是網頁或網址
    if userActivity.activityType == NSUserActivityTypeBrowsingWeb,
        let incomingURL = userActivity.webpageURL,
        let components = NSURLComponents(url: incomingURL, resolvingAgainstBaseURL: true),
        let path = components.path {
            
        print("path = \(path)")
            
        // 如果之前有做 URL Schemes 處理,可以搭配使用
        /*  書籍資訊
            https://www.example.com/book/12345678
            com.example.DemoApp://book/12345678
         */
        if path.hasPrefix("/book/"), let bookID = path.components(separatedBy: "/").last, bookID.count >= 10 {
            // 跳轉到書籍詳細資訊
            return true
        }
        return false
    }
        
    return false
}


 在 iOS 使用 Safari 瀏覽此網址,可以看到上方的橫幅。若沒有看到可以捲動一下頁面,它有時會隱藏。接著把網址放到備忘錄並對他長按放開,會多出一個 "在「XXX」中打開" 的選項。

 Apple 也有提供工具來檢驗,如果出現 Error no apps with domain entitlements 也不用太糾結,可能是有此功能的新版本未正式上線的關係,只要確定網頁上方有出現橫幅就是成功了。


參考資料
https://developer.apple.com/ios/universal-links/
https://developer.apple.com/documentation/uikit/core_app/allowing_apps_and_websites_to_link_to_your_content
https://developer.apple.com/documentation/uikit/core_app/allowing_apps_and_websites_to_link_to_your_content/enabling_universal_links
https://developer.apple.com/documentation/uikit/core_app/allowing_apps_and_websites_to_link_to_your_content/handling_universal_links

在 iOS App 裡實現密碼自動填寫

想像一下這個使用情境,某個服務有 Web 也有 App,若使用者有用 Safari 登入並記住密碼,那麼在 App 裡點擊 Text Field 的鍵盤會提示是否要用已儲存的密碼,點擊後帳號密碼就會填入對應的 Text Field 中,使用者完全不用自行輸入非常方便。

若要實現這功能需要從 App 以及 Web 兩邊都做設定,且系統需求為 iOS 11 以上。


Apple Developer 設定

先去 iOS App IDs 確定該 ID 的 Associated Domains 為啟用狀態。


Xcode 專案設定

Target → Capabilities → 打開 Associated Domains → + → "webcredentials:example.com"


Web 設定

新增一個 apple-app-site-association 檔案(沒有副檔名),內容如下:

{
    "webcredentials": {
        "apps": [
            "D3KQX62K1A.com.example.DemoApp",
            "D3KQX62K1A.com.example.DemoAdminApp"
        ]
    }
}

若已有這個檔案,只要加入 webcredentials 這個層級並保持 JSON 結構即可。
D3KQX62K1A 為 Team ID ,可以從這裡找到。
com.example.DemoApp 為 Bundle Identifier 。

將此檔案放在網站的 .well-known 資料夾下,整個網址就像這樣 https://example.com/.well-known/apple-app-site-association ,需注意必須要 https:// 開頭,如果有子網域也要分別作設定。每當 App 安裝或是更新版本才會去抓 apple-app-site-association 。


現在你可以試試先在網站登入並儲存密碼,儲存的密碼可在 設定 → 帳號與密碼 → App 與網站密碼 裡找到。

然後回到 App 的登入畫面裡點擊 Text Field 應該就可使用儲存的帳號密碼了,雖然這只是單向的。


你可能會發現並非所有的 Text Field 都會出現,因為預設是以 secureTextEntry 這屬性來判斷是否為密碼,若沒指定則需要另外要用 textContentType 來指定:

userTextField.textContentType = .username
userTextField.keyboardType = .emailAddress
passwordTextField.textContentType = .password

newPasswordTextField.textContentType = .newPassword
confirmPasswordTextField.textContentType = .newPassword

singleFactorCodeTextField.textContentType = .oneTimeCode


參考資料
https://developer.apple.com/documentation/security/password_autofill/
https://developer.apple.com/documentation/security/password_autofill/setting_up_an_app_s_associated_domains
https://developer.apple.com/documentation/security/password_autofill/enabling_password_autofill_on_a_text_input_view

使用 Network Link Conditioner 在 iOS 實機與模擬器模擬伺服器無回應逾時或網路極慢的狀況

在製作一個需要連網的 App 時,常常會需要打 API 取得資料,所以我們一定會針對伺服器回傳的資料處理,但要是伺服器根本就無回應呢?這時我們就需要使用 Network Link Conditioner 這項工具模擬出不同的網路環境做處理。


實機設定

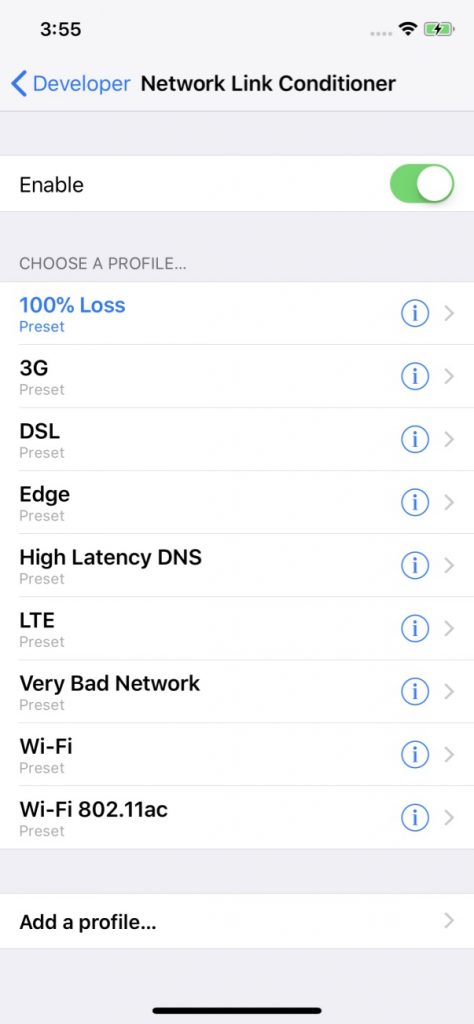
先從 設定 → 開發者 → Network Link Conditioner 進去。
選擇 profile ,這裡因為要模擬 timedout 的情況所以選擇 100% Loss 。
並且 Enable 設定為開啟,這樣整台 iOS 裝置都會受到影響。

Network Link Conditioner iOS


模擬器設定

由於模擬器的設定裡沒有 Network Link Conditioner ,必須透過電腦設定才行。
請依照 Xcode 版本下載對應的檔案,不然會沒有效果。
Xcode 8 以上請從這下載安裝。
Xcode 7 以下請從這下載安裝。

掛載 dmg 尋找 Network Link Conditioner.prefPane 並點兩下安裝重開機。
路徑是 Additional Tools/Hardware/Network Link Conditioner.prefPane 。
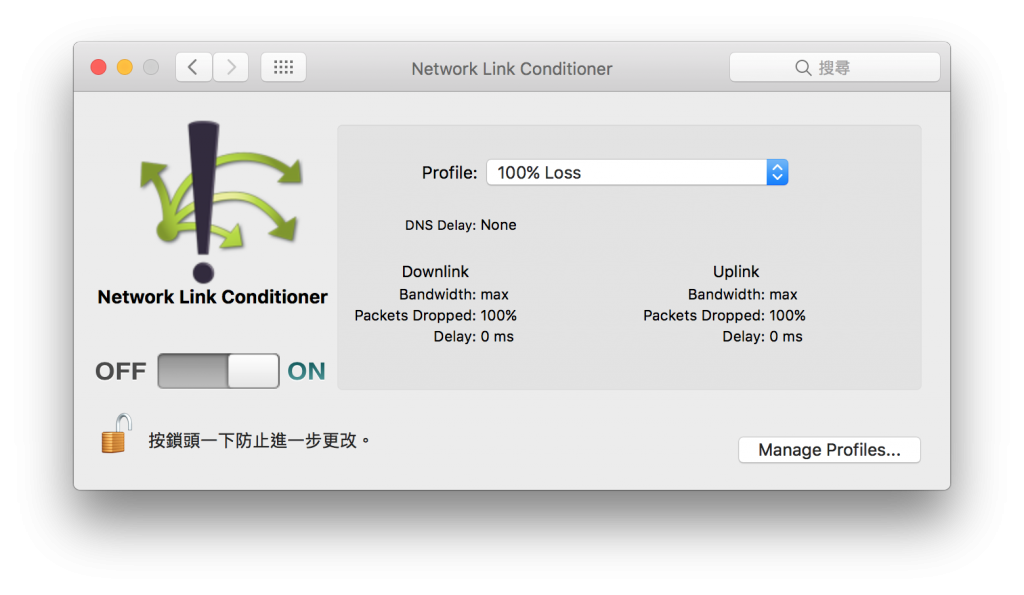
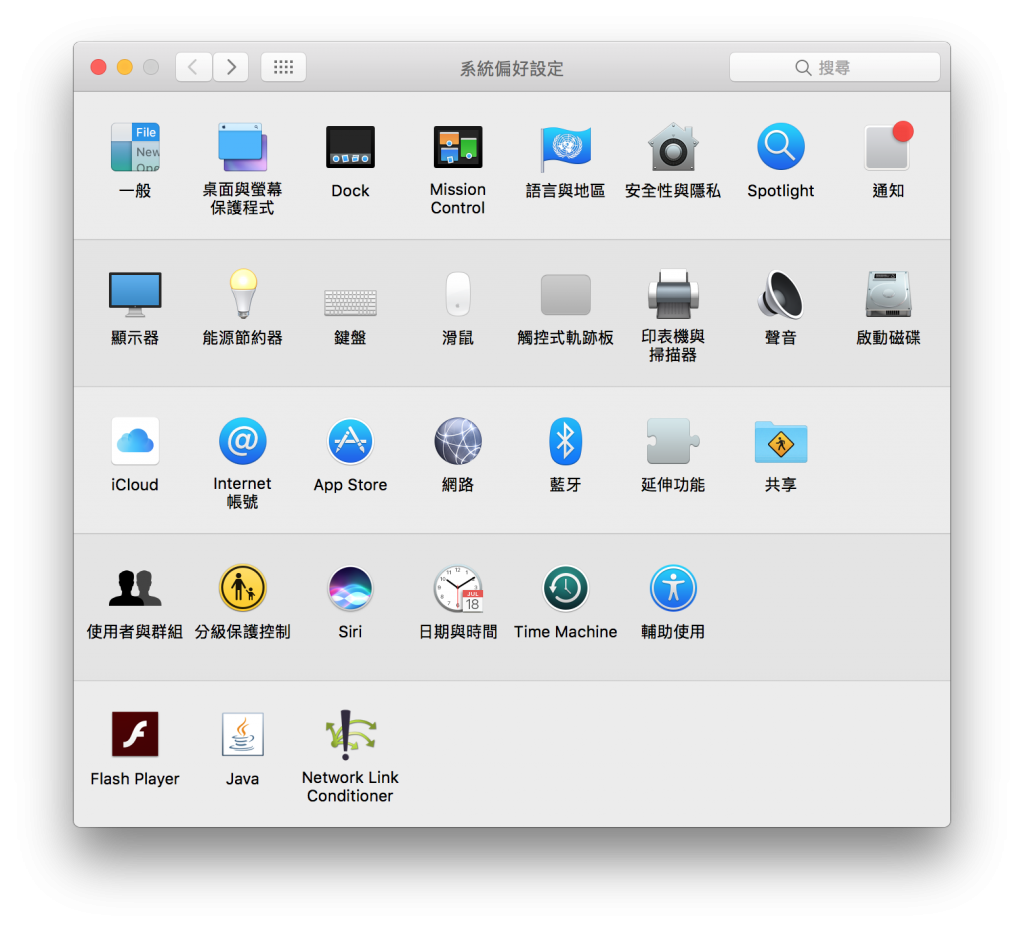
安裝成功會在系統偏好設定裡出現 Network Link Conditioner。

Network Link Conditioner Mac 1

Network Link Conditioner Mac 2

使用方法跟實機一樣就不多說了,也可用用 Very Bad Network 這個 profile 模擬網路超慢的情況,這個會影響到整台電腦與模擬器請小心使用。


Apps must follow the iOS Data Storage Guidelines or they will be rejected

2.23 - Apps must follow the iOS Data Storage Guidelines or they will be rejected

On launch and content download, your app stores 19.1MB, which does not comply with the iOS Data Storage Guidelines.

原因是我把下載的內容放到 <Application_Home>/Documents 底下,而這目錄預設是會備份到 iCloud 以及 iTunes 。依照 Guidelines 來看,Documents 只能放由使用者操作後產生的,而那種能重複下載或產生的要放在 <Application_Home>/Library/Caches ,暫存檔則放在 <Application_Home>/tmp

Cachestmp 不會備份,且 Caches 不是永久的,當裝置容量不夠時會刪除、系統還原時也會清空,如果想要永久就只能放 Documents 。 Library 底下除了 Caches 以外都會備份到 iTunes ,但不會上傳至 iCloud 。

放在 Documents 的檔案也可以手動標示為不要備份,由於我想永久保留至 App 內所以我採用此方法。

- (BOOL)addSkipBackupAttributeToItemAtURL:(NSURL *)URL

{

    assert([[NSFileManager defaultManager] fileExistsAtPath: [URL path]]);

    const char* filePath = [[URL path] fileSystemRepresentation];

    const char* attrName = "com.apple.MobileBackup";

    u_int8_t attrValue = 1;

    int result = setxattr(filePath, attrName, &attrValue, sizeof(attrValue), 0, 0);

    return result == 0;

}

請照以下步驟檢查 Documents 是否肥大
Install and launch your app
Go to Settings > iCloud > Storage > Manage Storage
Select your device
If necessary, tap "Show all apps"
Check your app's storage

參考連結
iOS Data Storage Guidelines
How do I prevent files from being backed up to iCloud and iTunes?
File System Programming Guide

解決 navigation bar 與 toolbar 背景顏色不一致

在 navigation bar 設定了背景顏色,並且右邊的 navigation item 使用 toolbar 來包2個 button 。

結果不但背景是預設的灰白色,而且上方還有細細的黑線。
toolbar1

這才是我想要的樣子~
toolbar2

    UIToolbar *toolBar = [[UIToolbar alloc] initWithFrame:CGRectMake(0, 0, 90, 44)];
    toolBar.barStyle = -1;   //透明背景
    toolBar.clipsToBounds = YES;   //修正上方的線
    [toolBar setItems:@[shareBarButton, favoriteBarButton] animated:NO];
    self.navigationItem.rightBarButtonItem = [[UIBarButtonItem alloc] initWithCustomView:toolBar];

personal hotspot 造成 status bar 高度改變

有兩種情況會讓 Status Bar 高度變成 40px (原來的兩倍)
1.打開個人熱點時
2.當有來電不接回到 App 時

模擬器也可以模擬40px 的 Status Bar
Hardware → Toggle In-Call Status Bar

使用 [[UIApplication sharedApplication] statusBarFrame].size.height 取得高度
或是使用 [UIScreen mainScreen].applicationFrame.size.height 取得扣除 Status Bar 的畫面高度

如果要兼容 iOS 6 與 iOS 7
除了元件的位置以及高度外
contentInset 與 contentOffset 也都要注意一下

如果無聊了話可以試試讓 Status Bar 變成 40px 再檢查別人 App 畫面有沒有怪怪的,畢竟不是所有開發者都會注意到此例外。

improper Advertising identifier [IDFA] Usage

IDFA 全名是 Identifier for Advertisers
我有用 AdMob SDK ,在驗證時出現這警告,沒理它直接上傳,狀態變成 Upload Received ,正當我還沉浸在愉悅中時狀態又變成 Invalid Binary ... (我還第一次遇到這種狀態)

好吧 原來還要另外做設定
在 Advertising Identifier 這區塊要做調整

Does this app use the Advertising Identifier (IDFA)?

選 Yes

This app uses the Advertising Identifier to (select all that apply):
Serve advertisements within the app

Limit Ad Tracking setting in iOS
打勾

做完上述設定後,驗證不再有警告,也順利上傳啦~